PhotoSteg
Embed (hide) any data file in a photo.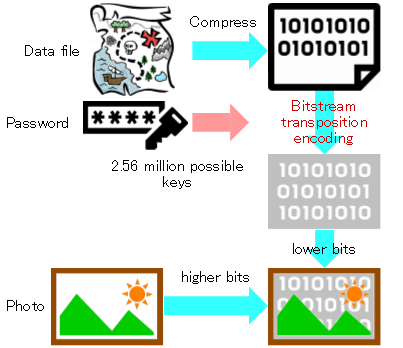
- Any data file can be hidden in a photo. Perfect for hiding treasure map or your own signature in the photo.
- There are no restrictions on the data file format. You can embed any file, including ZIP, EXE, JPG, PDF, XLSX, and DOCX.
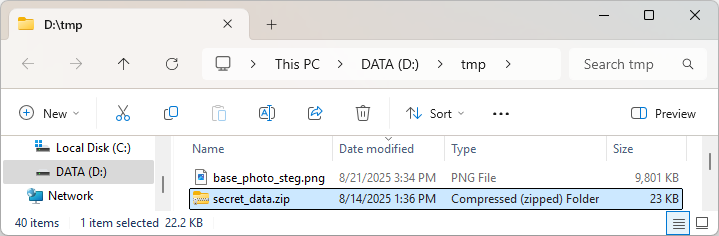
- Photo with embedded data file is saved as PNG 32-bit image.
- If the number of pixels (width x height) in a photo is [N], you can embed a data file of approximately [Nx2] bytes.
- Embeds data file in alpha channel for transparency and lower RGB bits.
- Embedding the data file will degrade the image quality, but it will not be noticeable unless you compare it with the original photo.
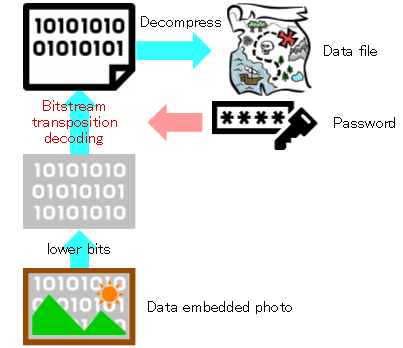
- Data files hidden in photo cannot be retrieved unless the password matches.
- The data is encoded by transposing the bit string using a unique rule (key) generated based on the password.
- There are 2.56 million possible keys, so it is not easy for someone who does not know the password to decrypt (decode) it.
- There are GUI applications (applications with a screen) and CUI commands (applications without a screen).
- GUI applications[PhotoSteg]
- You can embed data files in photos and extract data files from photos.
- CUI commands[pnggets]
- You can extract data files from photos.
- Files
.
│  PhotoSteg.exe
│  plib.dll
│  pnggets.exe
│  PUtils.dll
│
├─ cfg/
│      stegParam.xml
│
└─ ja-JP/
        PhotoSteg.resources.dll
A settings file (xml file) is generated but unused. No settings are saved.
Usage
Embed a data file in a photo
- Start PhotoSteg.exe.
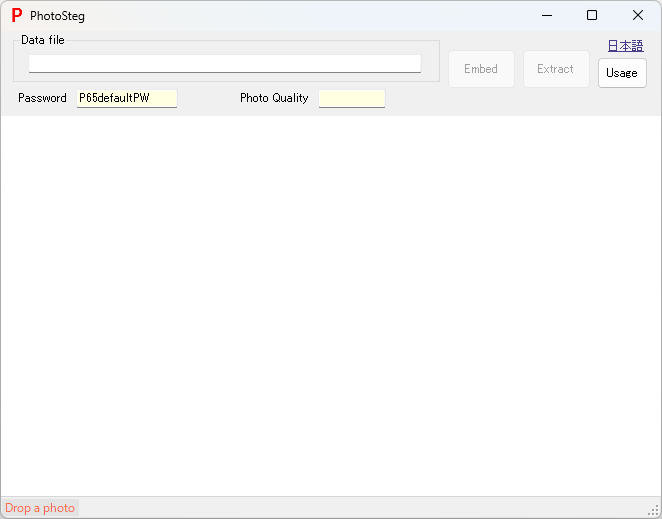
- Drop the data file into the data file name display area at the top of the screen.
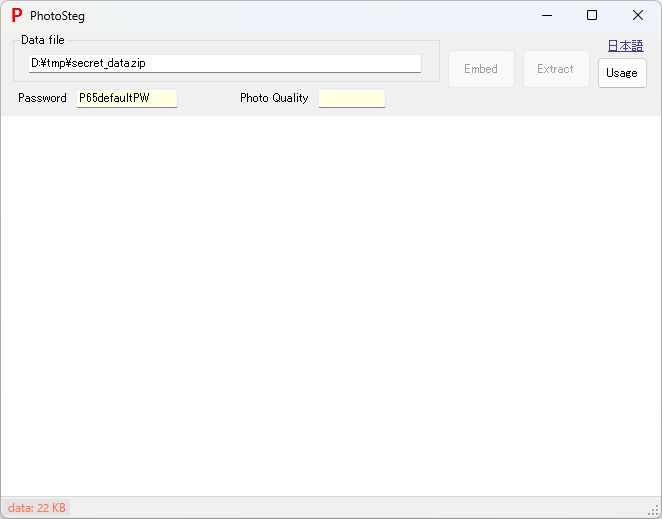
- The compressed data size is displayed at the bottom of the screen.
- You can also drop the data file after the photo.
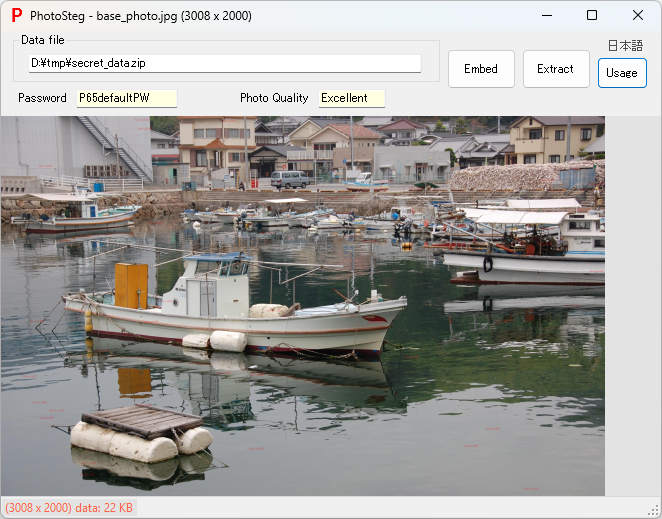
- Drop the photo (image file) into the image display area in the center of the screen.
- Right-click menu
 , Import the image from the clipboard.
 - The photo is inspected to see if it has suitable image quality for data embedding, and the result is displayed as photo quality [Excellent][Average][Poor]. If the photo is flat, it is more likely to be rated [Poor].
- If the photo quality is [Poor], you will need to drop a different photo.
- If you are warned that the photo is too small for the data file, you will need to drop a different photo.
- The image file to be dropped can be a PNG image or a BMP image in addition to a JPEG image.
- Right-click menu
- Confirm the password or specify your own password if desired.
- The default password [P65defaultPW] is always set initially.
- Although the system has the ability to specify a unique password, if you specify a password carelessly and then forget it, you will never be able to retrieve the data files embedded in the photos, so the system is designed so that you cannot specify a password unless you follow a specific procedure. I recommend using the default password until you become familiar with the process.
- The password must be at least 8 characters long, with 10 to 12 recommended. The password can only contain alphanumeric characters, underscores (_), and minus signs (-).
- If you wish, I can modify it so that you can easily specify your own password (please contact me).
- Select [Embed]. Specify the location and file name for the photo with the embedded data file, then click [Save].

- If a file with the same name exists, you will be asked whether to overwrite it.
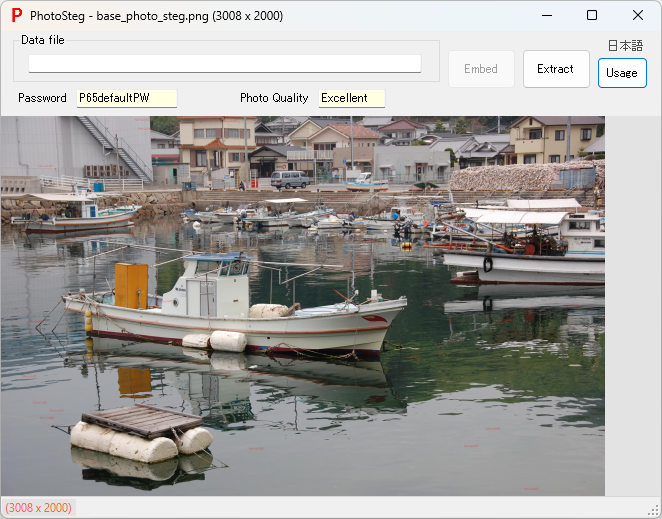
- The photo with the embedded data file will be displayed on the screen, but it will be difficult to tell the difference from the original photo.
Extracting data file from photo (PNG image file)
- Start PhotoSteg.exe. If it is already running, there is no need to restart it.
- Drop the photo (PNG image file) with the embedded data file into the image display area in the center of the screen.
- Confirm the password or specify your own password if desired.
- The default password [P65defaultPW] is always set initially.
- There is no mechanism for remembering passwords, so if you specify your own password, you will need to enter it every time.
- Select [Extract]. The extracted data file will be saved in the same location as the dropped photo.
- If a file with the same name exists, an error will be displayed and saving the data file will fail.
Use the command [pnggets] to extract data file from photo
- Start a console (command prompt, DOS window).
- If you enter the command[pnggets], the usage will be displayed.

- The data extraction command [pnggets.exe] can be executed independently.
- According to Usage, when you enter the command by specifying the photo file name and password,
a compressed file [_gets_data.zip] containing the data file will be generated.


- Extract the compressed file and extract the data file.